How to Create Lessons for Positive Elementary Music Classroom Management
The way you design and deliver your lessons has a profound effect on elementary music classroom management. See the helpful tips below.
Some of the links on this site are affiliate links. If you click on a link and make a purchase, I may earn a small commission at no cost to you.
Do you ever wonder how some elementary music teachers seem to deliver smooth lessons with fewer interruptions? The truth is, there’s no such thing as a perfect classroom—or a perfect teacher. But the way you plan and deliver lessons has a powerful effect on student behavior.
The tips and techniques below can help you build a positive climate in your elementary music classroom.
What’s in this post? Click to open the Table of Contents
- Everything Relates to Everything!
- Structure Activities with NO Wasted Time
- Move Immediately from One Activity to Another
- Organize Lessons in PowerPoint or Google Slides
- Embed Directions into Your Presentation
- Revamp and Make Your Lessons Better
- Track Class Completion of Activities in Your Presentations
- Add-On Activities Keep Lessons Fresh
- Have Alternate Activities Ready
- Deliver Lessons with Enthusiasm
- Use Flexible Classroom Routines
- High Expectations are Crucial
- Provide Differentiation
- Accommodate with More Guided Practice
- You Don’t Just Teach Music
- You Can Create a Positive Classroom Climate
Everything Relates to Everything!
This mindset is essential when designing lesson plans. Every choice you make, including activities, pacing, and transitions, shapes the classroom climate. When lessons are fun, interactive, and time is used wisely, students are more engaged and less likely to misbehave.
Of course, classroom management is a complex challenge with many factors beyond our control. So, let’s focus on the areas we can control as music teachers.
Structure Activities with NO Wasted Time
Begin each class with a transition activity that engages students as soon as they enter the room. If possible, start the activity in the hallway so even the students at the back of the line are participating right away.
Smile, nod, and make eye contact with EVERY student as you sing or chant together during entry. Your transition activity should capture attention and keep everyone involved as they sing, chant, snap, clap, and move to their ASSIGNED spot.
For more on how to use transition activities, take a peek at this post: 10 Tips to Integrate Music Reading into Every Elementary Music Class.
If you use a classroom agenda, have it on the board so students can see it as they enter. Then move immediately to the first activity.
Move Immediately from One Activity to Another
Use as few words as possible as you transition from one activity to the next. If doable immediately jump into the next activity without any directions. Use sign language and/or simple signals to SHOW your students what to do.
Kids naturally want to be active. They don’t need lengthy explanations about what’s coming next. If you need to give verbal directions, keep them VERY brief and to the point. For more ideas, see this post: Talk Less and Teach More Music. It includes simple signs, signals, and two-word catchphrases you can use with your students.
Organize Lessons in PowerPoint or Google Slides
Organization and preparation are key! When you design your lessons in presentation software you can move immediately from one activity to the next even if the songs or activities are from different resources.
- Copy, paste, import, or take a screenshot of each activity and add it to a slide (or slides).
- Include all necessary materials for each activity on the slides.
- Upload audio files for easy access.
- If you’re using another platform (e.g., Boom Cards, Quizlet, Virtual Field Trip to the Symphony), include a direct link to the activity on the slide.
- Add learning targets to each slide or as an introductory slide before the activity.
If your administrator requires you to turn in your lesson plans:
- Print your PowerPoint or Google Slides presentation with 6 slides per page, and you’re all set!
- If you’ve added notes in the notes section, print 3 slides per page with the notes included. The images will still be large enough to read.
Embed Directions into Your Presentation
Embedding directions into your presentation has many benefits.
- Allows you to talk less and teach more. Depending on the level of your students you may be able to point to simple succinct directions and jump right into the activity without verbal directions.
- When you use different modalities, you reach more students. Students who struggle with aural comprehension may perform better when they SEE the directions. And, hearing-impaired students will definitely benefit from being able to see written directions.
- Keeps teacher on track. With everything music teachers have to do swirling around in our heads, it’s easy to get sidetracked. When the directions are embedded into your presentation this is one less thing you have to worry about. This sets you up to deliver a fluid, seamless lesson.
- Allows a sub to deliver your lesson. Depending upon the musical knowledge and skills required, it’s much easier for a sub to deliver your lesson if the directions are embedded into each activity.
- Reduces power struggles. Some students resist being told what to do by a teacher, but they tend to follow directions when the instructions come from the activity itself. (I know this doesn’t make much sense since you’re the one who created the presentation but it does happen.)
Revise and Improve Your Lessons
When a lesson does NOT go as planned, it’s easy to revamp your PowerPoint or Google Slides. Immediately make small tweaks or switch out any elements you would change before you deliver this particular lesson again.
Consider involving your students in this constructive criticism. Ask them the following:
- Next time, if we did _______, would that help you?
- How do you think this lesson could be improved?
- What would help you learn this easier?
Students may catch a misspelling or typo. Correct it in class and thank them.
Track Class Completion of Activities in Your Presentations
Repetition and practice are essential. Music activities aren’t a one-and-done event; I usually repeat each activity at least three times. For elementary music teachers with multiple classes of the same grade level, it can be challenging to keep track of which classes have completed each activity.
Assemblies, holidays, snow days, and a plethora of other events can disrupt our carefully-planned lessons and throw off our class sequences. I’ve used a simple chart embedded into the corner of each slide to track where each class is with each particular activity.
Class Activity Completion Chart
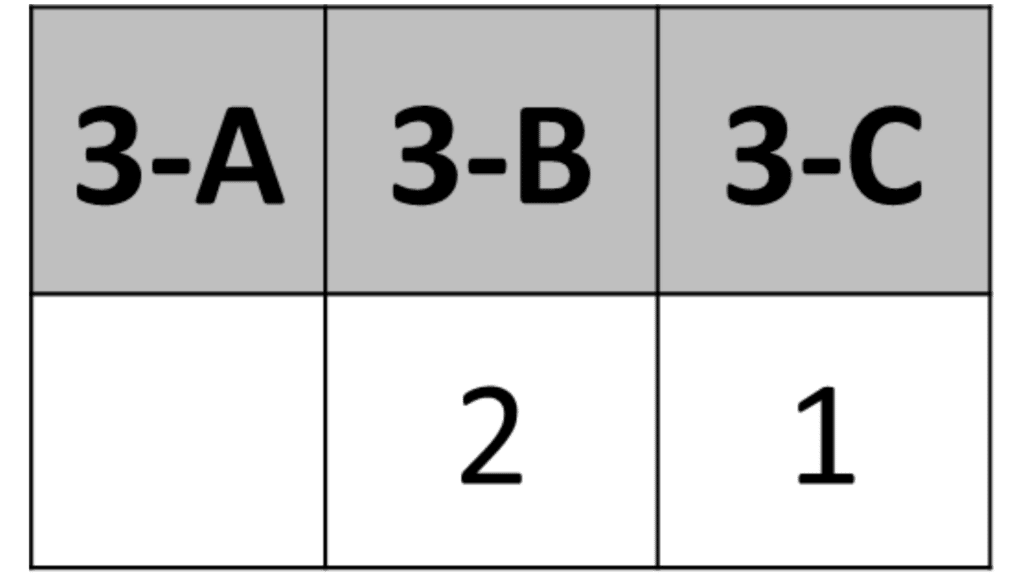
The top row represents each third-grade class, while the bottom row shows how many times each class has practiced the activity. Students enjoy tracking their progress and feel a sense of satisfaction and accomplishment when they see these small charts included with each activity.
This simple chart also helped me track which “add-on” activities each class had completed. Our learning sequence might look like this:
- Learn the vocal part.
- Add instruments in unison.
- Layer instrumental Orff ostinato patterns.
By following this standard pattern, I can quickly determine where each class should begin:
- Class 3-B: They’ve already played the instrumental part once. They just need a quick refresher before layering the ostinato patterns.
- Class 3-C: They haven’t played the instruments yet, so I need to introduce that activity.
- Class 3-A: They still need to learn the vocal part.
Sometimes you may not finish an activity. In this case, I use the following markings or something similar.
- “S” for started but didn’t complete the activity.
- 2+ would mean some but not all students got to have a turn.
This lets students know we will finish this activity so everyone will get a turn. All turns are recorded on my activity record in my grade book.
Use Add-On Activities to Keep Lessons Fresh
Add a new element each time you practice an activity to keep your lessons fresh. These add-on activities should reinforce the specific learning targets of each lesson.
Ideas for add-on elements are below.
- Hand clap patterns
- Movement
- Props – scarves, parachutes, etc.
- Games
- Simple folk dance
- Body percussion
- Orff instrumental activities
- Add harmony – rounds, descants, layer partner songs, etc.
Have Alternate Activities Ready
For students who choose inappropriate behavior, have alternate activities readily available. Alternate activities might include the following.
- Body percussion moves to match the playing of a rhythm instrument.
- Play a laminated paper xylophone instead of a real xylophone.
- Perform a movement activity without the props.
- Do the movement activity near the safe seat (time-out chair).
- Another dance/movement option is “finger dancing” at the safe seat. Students use their fingers to reenact the dance moves.
- Alternate pencil/paper activities.
Do NOT allow students to be disruptive. Give one reminder, then take action.
Deliver Lessons with Enthusiasm
Choose FUN songs and activities YOU like and enjoy. Make eye contact and connect with your students. Smile and enjoy the activity together.
You want your students to like and enjoy your classroom activities. And they will see through the façade if you try to fake it.
Use Flexible Classroom Routines
Schedule SHORT music reading activities at the beginning of class when students are fresh. These music reading lessons should lead directly to a related game, movement, instrumental activity, or other FUN activity to reinforce learning.
Break up any long portions of your lesson with movement. This movement can be as simple as moving to the book corner when you read a story.
See this blog post for more about creating efficient and effective classroom routines.
High Expectations are Crucial
Challenge your students and give them the tools to be successful. They will live up to your expectations. Create challenging but attainable activities with differentiated options for students of varying abilities.
Provide Differentiation
You do NOT want your advanced students bored with oversimplified activities. But you don’t want your struggling students to give up because an activity is too difficult. A few ways to differentiate activities are listed below.
- Create differentiated Orff accompaniments. This could range from a simple steady beat on a fun rhythm instrument that students don’t get to play often – temple blocks, cabasa, etc. Or, a simple melodic accompaniment on Boomwhackers or barred Orff instruments.
- Label the pitch names. Print a copy of the music for students who need additional help. Label the pitch names on the note heads to focus student attention on the notes. If you write the pitch names above or below the note, this does not help reinforce musical concepts.
- Provide additional guided practice. See below.
Accommodate with More Guided Practice
Provide more rote practice to help students who struggle. This could include the following.
- Chunking. Break down activities into smaller phrases or chunks.
- Echo practice. Increase the length of phrases as student performance levels rise.
- Sing rhythm patterns. When you practice song rhythm patterns, sing the rhythm syllables to help reinforce the melody.
- Point to the notes on the whiteboard as students read the rhythm or pitches. Always face students so you can gauge their comprehension and engagement.
- Teach body percussion moves that imitate instrumental accompaniments for specific instruments – pat knees for bongos, clap for tambourine, slide hands for sand blocks, etc.
- Say and play. Chant or sing a pattern 4 times, then immediately play it 4 times.
- Reverse chaining. Try learning the end of a song or instrumental accompaniment first. Student confidence grows as they sing or play through the piece.
You Don’t Just Teach Music
As music teachers, we teach a whole host of other skills including SEL, Social Emotional Learning or SEAL, Social Emotional Artistic Learning. Many of these standards are naturally built into our lessons.
A compassionate elementary music classroom with carefully chosen activities fosters the following SEL or SEAL principles (and more) in almost every class session.
- Listening skills
- Nonverbal and verbal communication
- Cooperation and team building
- Confidence and REAL self-esteem through achievement and building music skills
- Positive messaging through songs
- Opportunities to be expressive and creative with improvisation and composition
- Positive forms of self-evaluation
- Growth and improvement mindsets
Not all states have developed SEL or SEAL standards yet. Click to check the SEL standards in your state.
You Can Create a Positive Classroom Climate
There is NO SUCH THING as a perfect elementary music classroom. You’re NOT missing the one secret ingredient. But these strategies can help you structure and deliver lessons that have a BIG impact on your students and your classroom climate.
You can create a positive and productive elementary music classroom management system.
➡️ See More Elementary Music Classroom Management Ideas
Effective Strategies for Daily Music Classroom Management
Do you need more effective strategies to create a positive climate in your elementary music classroom? Take a peek at these 11 Tips for Positive Elementary Music Classroom Management.
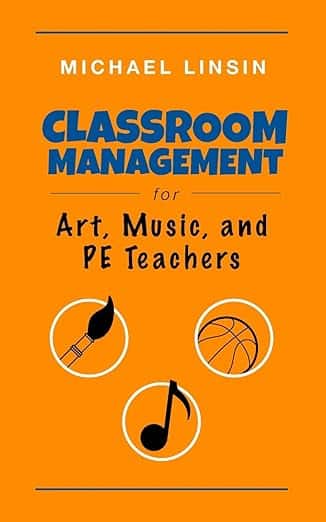
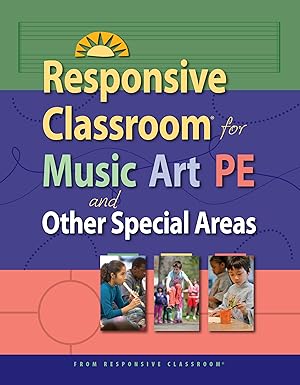
📚 Two Books I Highly Recommend
Ask your administrator to purchase these books or check out your local public library. If they don’t have these titles on the shelf, they should be able to get them through interlibrary loan.
More Related Posts:
Meet the Author
Terri Lloyd is an experienced music educator with over 25 years of teaching in elementary music classrooms. She holds a Master’s in Education, an Instructional Technology Certificate in Curriculum Design, and a Bachelor of Music. Her resources are designed to help music teachers develop students’ music literacy and performance skills while enjoying learning.
She presents music education workshops, develops curriculum, and writes for her blog. Terri is on the music staff at her church and leads a children’s program. She performs as an active community musician with a local Big Band, pit orchestras, and at various events.